Overview This guide will assist you to create a golden image and then deploy session hosts from...
Manage, delete, and update golden images via the MyCloudIT platform.
Manage Golden Images
Once golden images are created, you can view them in the Images page. To view them, navigate to Manage > Images in the MyCloudIT platform for your customer, if application.
- To delete a golden image:
- Choose the image you with to delete.
- Click on the the ellipses and then select the Delete option.
- In the modal, select 'I Confirm' and click on the OK button.
- To view/edit image notes:
- Choose your image.
- In the Image Versions table, click View in the Notes column.
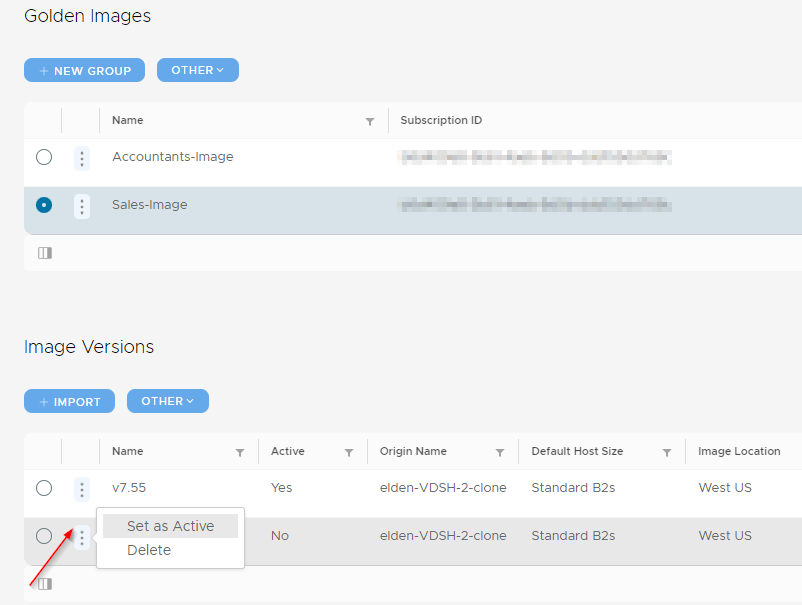
- To set a version of an image as active:
- Choose your image.
- In the Image Versions table, click the menu on the version you want active then click "set as active".
- To import an image not already in the MCIT portal.
- Make sure the image exists via: https://portal.azure.com/#view/HubsExtension/BrowseResource/resourceType/Microsoft.Compute%2Fimages
- Create "+NEW GROUP" or select an existing image and click "+IMPORT"
- Fill out the details and select Import.
- You may then want to set this new imported image as Active.
Note: It is a good idea to keep a spreadsheet with clone names, settings, golden images and versions etc, to keep track of golden image versions, changes and which SH's use particular images.
Update a Golden Image
If you deployed a fresh collection and configured a base image from scratch, here is how you can update your master image:
- Turn on your session host.
- Log on to the session host console as an administrator (See Appendix A).
- Customize the session host with further windows updates, software installation, settings etc (See Appendix B).
- Deallocate the session host.
- Proceed to Step 2 - Clone a Session Host and continue through the rest of the remaining steps.
If you want to update directly from a current golden image, the steps are:
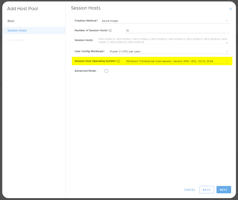
- Perform Step 6 - Deploy a Session Host with a Golden Image to create a fresh session host from your golden image and do not allow users to log on to it.
- Proceed to Step 2 - Clone a Session Host and continue through the rest of the remaining steps.
Appendix
Appendix A: Log on to the Session Host
Connect by clicking "Connect" in the Azure portal on the MSDC VM, then remote desktop to the session host by using its name. Example command: "mstsc /admin /v:spark-RDSH-0"
- The MCIT portal button is in development and will be available soon. When it is this document will be updated.
Appendix B: Customize a Session Host
Once you log into the session host, the common steps administrators perform are:
- Install all Windows updates
- Install all user software (examples: Adobe reader, Microsoft Office). Pro Tip for RDS: You may need to use RDS install mode when installing applications
- Configure per machine settings that are not centralized
- Configure per user settings that are not centralized
- Tune the OS and software
- Add RMM / Monitoring tools
- Install anti-malware / anti-virus
- Restart the session host multiple times during the above configurations