Add an existing AVD deployment to the MyCloudIT platform to utilize its features This guide will...
Add an existing RDS deployment to the MyCloudIT platform to utilize its features
This guide will provide an overview of 'mapping' a Microsoft Remote Desktop Services (RDS) deployment via the MyCloudIT (MCIT) system. Mapping is the process of 'importing' the settings of an Azure based RDS instance into the MCIT system. This mapping process alone (does not include MCIT RDS Agent) will not change your RDS deployment in any way.
This guide covers the following scenarios:
- You want to 'map' (import) an existing Azure based RDS environment that was not created by the MyCloudIT deployment wizard to be able to take advantage of MCIT RDS autoscale and other features.
- For some reason an MCIT RDS deployment has been 'unmapped' and needs to be 'mapped' again.
This guide currently does not cover the following scenarios:
- Mapping an RDS environment that is not hosted in Microsoft Azure
- Mapping an environment that is not RDS or AVD based
- Migrating a classic (v2) MCIT deployment, we can assist with this please contact us
Acronyms used in this document:
- AD - Active Directory (An instance of an Microsoft Active Directory Domain Services install on a physical server, VM in azure, etc)
- RDS - Remote Desktop Services (Microsoft's suite of services for delivering thin clients with a full desktop or 'remote apps' via the Windows server operating system)
What you will need:
- A Microsoft Azure tenant and subscription where your current RDS deployment is hosted
- A login to the above Azure tenant with owner or contributor access to the subscription
- Azure AD global administrator permission
- AD credentials
- About 15 minutes free time
Process Overview
To map an RDS deployment log in to the MyCloudIT portal and if applicable to the correct customer:
- Log in to the MyCloudIT portal and if applicable to the correct customer.
- Navigate to Manage > Deployments and then click on the Map Deployment button.
- Follow the wizard to completion.
Below are some specific considerations to help you make choices on the various pages of the wizard.
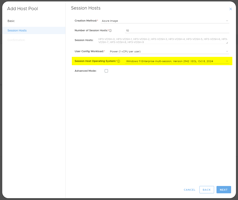
Step 1- Basic

- Select "RDS" as the Deployment Type.
- Choose any Name for this particular RDS Deployment mapping. Often the resource group name is used here.
- Type a small description of a Provider for this particular RDS Deployment. If unsure, type "Custom RDS"
Step 2 - Virtual Machine Mapping
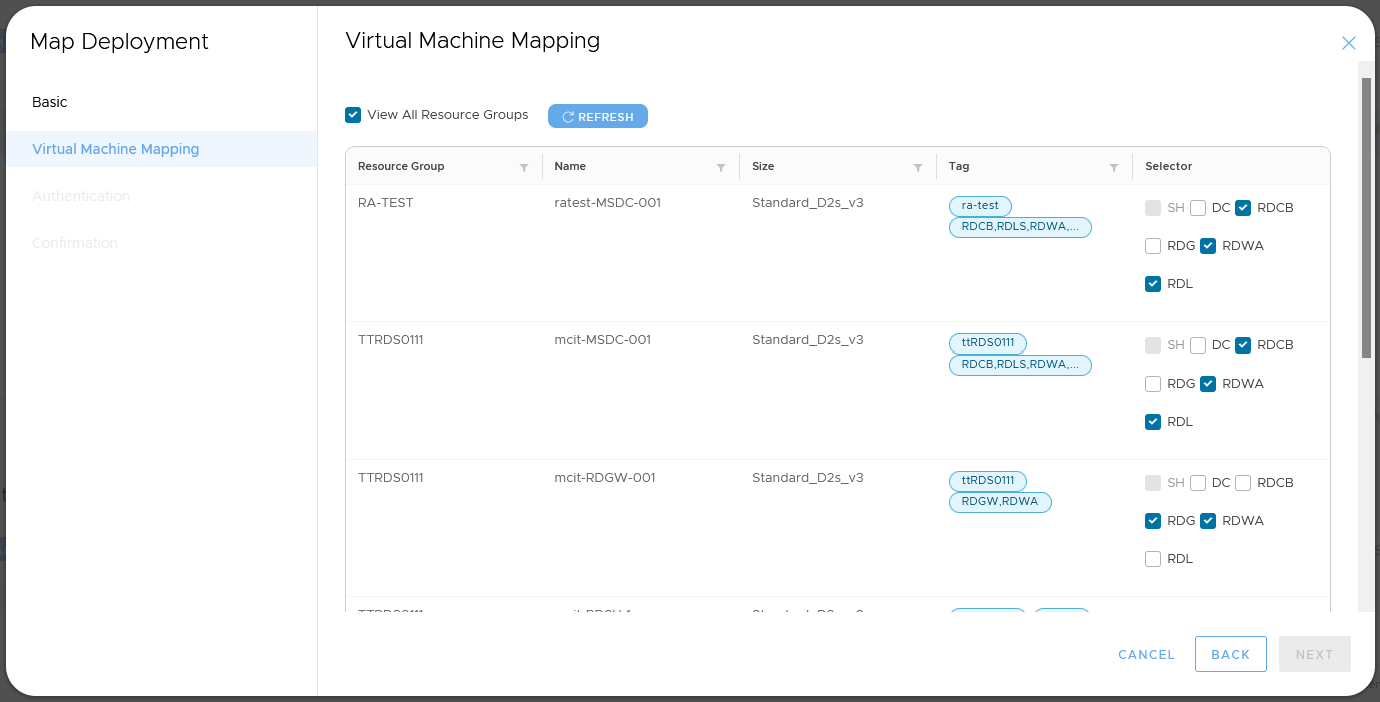
- Tick the various server roles that already exist in your RDS deployment that particular virtual machines hold. Possible roles are:
- DC: Domain Controller
- RDCB: Remote Desktop Connection Broker
- RDL: Remote Desktop Licensing
- RDG: Remote Desktop Gateway
- RDWA: Remote Desktop Web Access
- SH: (Remote Desktop) Session Host
- Notes:
- You must choose at least one DC
- You must choose at least one RDCB
- You must choose at least one SH
- Virtual machines that are mapped in another deployment (except DC's) already are not available for selection.
- Tick the 'View All Resource Groups' if some of your virtual machines are in other resource groups to display them.
- Note when scrolling to the bottom of this page you can select to display more machines by clicking the "Items per page" drop-down and changing to 100.
Step 3 - Authentication
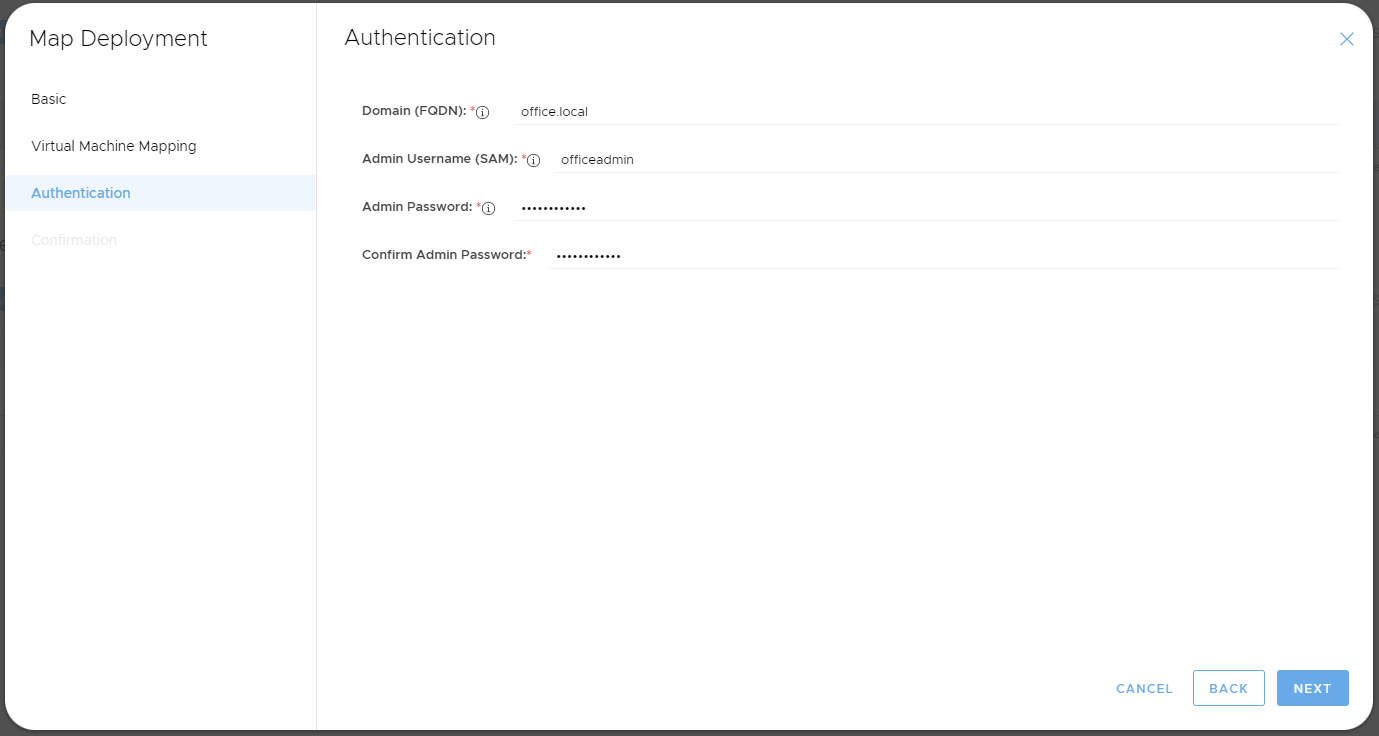
- Input your existing AD domain name in the Domain Name field. An example is office.local. This domain name does not always match your publicly resolvable RD-Gateway DNS name (however some customers these are the same). You can check the domain name via "Active Directory users and computers".
- The Domain Admin Username should be specified as a username only, example: 'myusername'. It should not be specified as myusername@office.local or office\myusername.
Step 4 - Confirmation
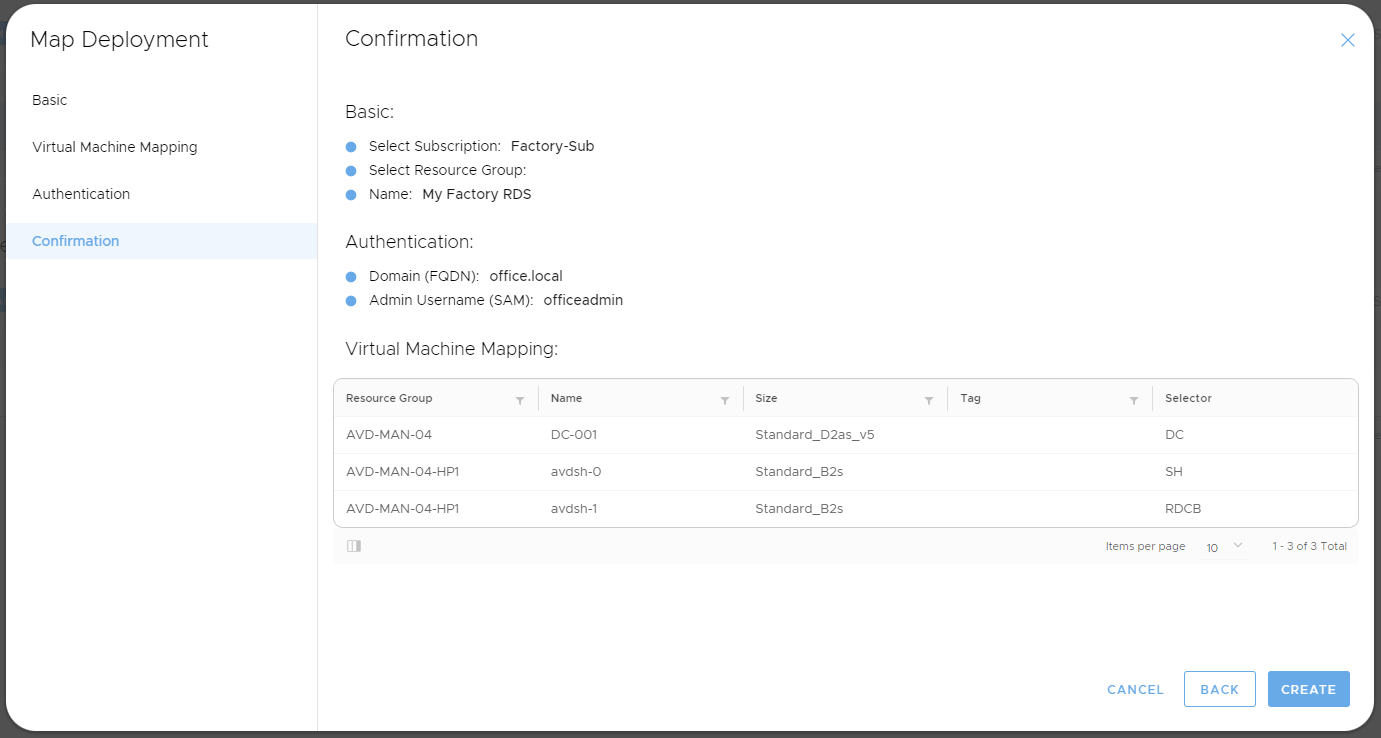
- Review your RDS deployment mapping settings and click on Create to add your deployment to the MyCloudIT platform.
Next Steps
MyCloudIT RDS session host management and autoscaling requires the agent to be installed on the domain controller virtual machine.
- Install the RDS Agent. Most MyCloudIT RDS features require the agent installed on the MSDC virtual machine.
- After you mapped the deployment, the wizard will ask if you want to install the agent or not.
- If selected, the platform will automatically install the agent, the process takes a couple of minutes.
- Once the agent is installed, it will take a couple minutes until you will be able to see the Collection(s) / Session Host(s) for that mapped deployment.
- For further details: RDS Agent Installation
- A few examples of features that use the agent to perform tasks are:
- Delete Session Host
- RDS session host autoscaling
- Send message to RDS users
- After you mapped the deployment, the wizard will ask if you want to install the agent or not.
Appendix
Appendix A: Create an Azure Availability Set
- Log in to the Azure portal and go to create new availability set. Another way to do this is via the following link: https://portal.azure.com/#create/Microsoft.AvailabilitySet
- Select the domain controller resource group and fill out the settings. For the Name create a name such as RDSH-SET. Make sure the 'Region' is the same location as your session hosts.
- All other settings should be fine as default. Create the availability set.